Installation Instructions:
1. Make sure threads in crankshaft are clean and are good threads.
2. Lightly coat the end of the stud going into the crank with “NEVER-SEEZ” (note: “Never-Seez” is the only material to be used!)
3. Install stud with 15 ft./lbs. of torque. DO NOT use any Loctite type products.
4. Install damper and accessories.
5. Install .300″ thick washer. Make sure the surface the washer is going against is parallel.
6. Lightly coat threaded area where the nut goes and coat the bearing surface of the nut with “NEVER-SEEZ.”
7. Install nut using 75 ft./lbs. of torque. (except CPPI-013F use 65 ft./lbs. of torque)
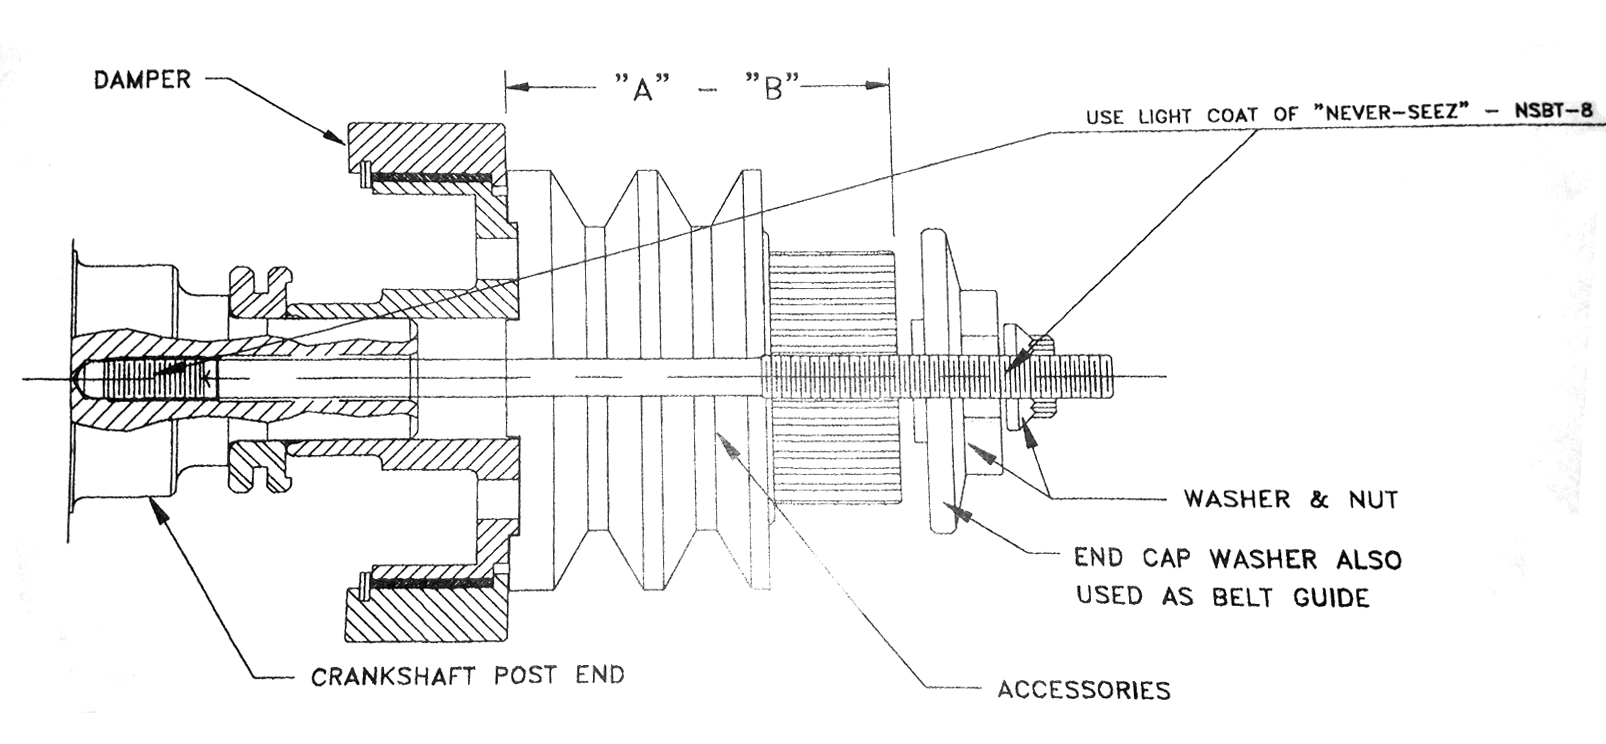
| Stud Kits Available: | “A” – “B” Dimension | Correct Stud Kit |
| (Kit Includes 6pt. Nut, .300? Thick Ground Washer & Stud) | 0.770″ to 0.832″ | CPPI-013D 7/16″ x 5.409″ |
| 0.803″ to 1.819″ | CPPI-013G 7/16″ x 6.396″ | |
| 1.640″ to 3.819″ | CPPI-013E 7/16″ x 8.396″ | |
| 3.042″ to 5.819″ | CPPI-013F 7/16″ x 10.396″ |
i bought a short block assembly gen 3 hemi, with a compstar crank in it, i need to now what harmonic balancer bolt i need for the stock balancer to be installed
Hi Richard, One of our guys will be emailing you soon.
Hi
I’m interested in 3.5 inch stroked crank for a 6.2 LS block with std rods bearing sizes.
Is this something that would be possible with you guys?
Cheers
Ash
Hi Ashleigh, one of our guys will be emailing you soon.